⌨️ One Key to Rule Them All
AI made me come back to a topic that was always bugging me. I have one monitor that is connected via HDMI to my Windows PC, and a MacBook connected to the DisplayPort via my CalDigit dock. I was outraged that I always had to press a button on my keyboard, another below my mouse and the button on the monitor, which I had to press 4 times. Those acrobatics might be good for my health, but I have better exercises for that goal.
Prequel
The first time I tried to solve this issue, I was researching Mac tools that switch my monitor to another computer, and I found BetterDisplay among them. This is what I started using for the time being. I never really understood how I should use all the nitty-gritty options it had.
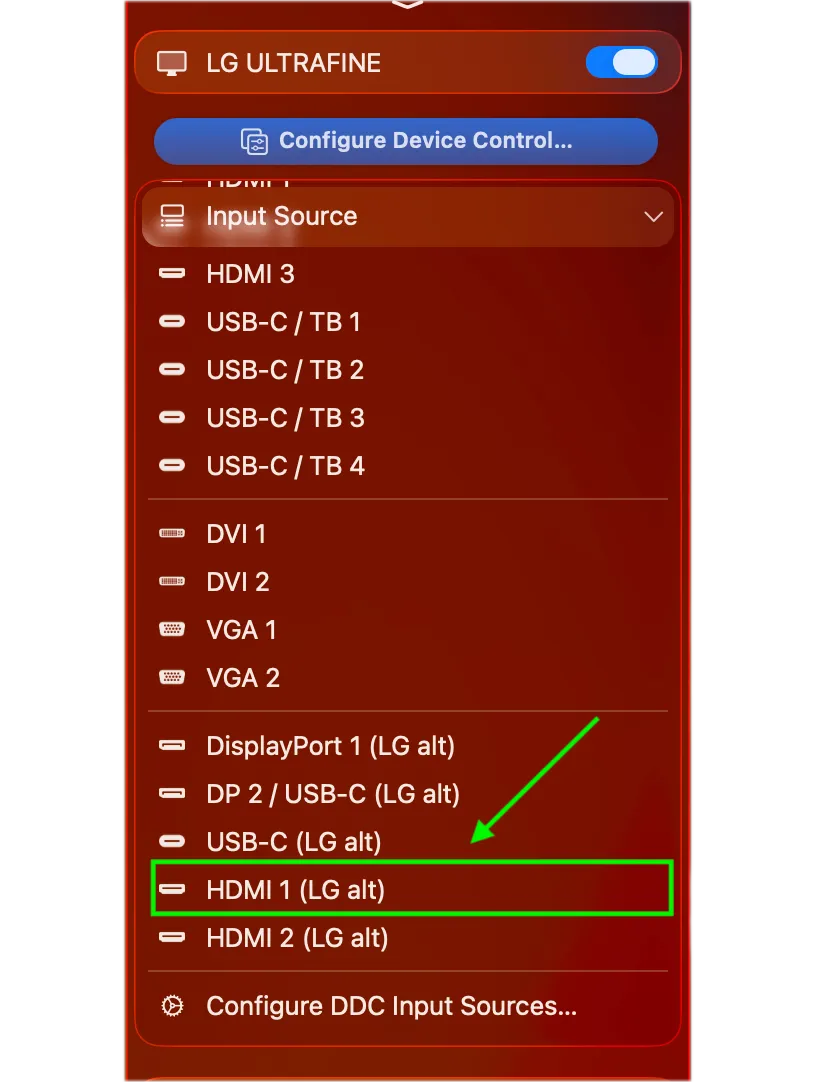
There it was! The one-way button to my PC, behind another 3 clicks, and still, mouse and keyboard wouldn’t follow… This button also didn’t work sometimes, so I kept BetterDisplay to dim both of my displays, but never used it for its actual purpose.
The Twist
Six months later, I needed to organize my external drives, which has been a standing to-do on my list for almost a decade. Since the drives were formatted in NTFS, they only worked properly on the PC. I wanted to do some big file transfers and continue working on my Mac while doing so, so I started with another side quest. And forgot about the main quest.
If I just prompt harder about this problem, Claude Code will give me a better solution, right? 🤔
Right, for the next 3 hours I let my little assistant research in a chat fight what I could do better this time.
What is DDC/CI?
DDC/CI stands for Display Data Channel / Command Interface, and it is a VESA (Video Electronics Standards Association) standard that lets software read and change the monitor’s settings while connected over HDMI or DisplayPort.
It’s pretty antique, from 1998, so every monitor supports it? That’s what I hoped for, but I didn’t have any expectations after my last journey. I was already fantasizing about adding an ESP32 to the HDMI and USB-C ports that work, so I could build a phone app that connects via Bluetooth and switch with only one button click on my phone, or buy an Elgato Stream Deck later. There is one catch, though. Only the currently active port of my monitor accepts commands, so a random device on an inactive port would do nothing…
The Mac side of the problem
💡 The tutorial starts from here onward.
It turns out that I wasn’t pragmatic enough. Last time I installed a Swiss Army knife, when I only needed the screwdriver. The same developer who made BetterDisplay also had a command line tool just for DDC/CI, made specifically for Apple Silicon Macs, called m1ddc.
brew install m1ddcThat’s it, now let the AI guess what to do next. My research skills are now limited to Claude Code, and that’s where the question was sent. I gave it my monitor model, LG UltraFine 27UP85NP-W, so it came up with this command:
# ...try running this command for your monitor ... HDMI 1 should be 144 (0x90)...
m1ddc set input-alt 144
Crazy, it worked! This set the input source to the HDMI 1 port of my display. Great!
The Windows side of the problem
Now I was curious, how do I get back? The reason why I was skeptical and lost track the first time was that LG monitors kinda have quirks. This is what I found out:
The monitor input is switched over DDC/CI with LG’s own input command (VCP
0xF4at address0x50), because the monitor ignores the standard input command.
From my research, not all monitors implement the whole specification correctly, so I thought I had just made a bad bargain with the monitor. But there are great minds who solve those issues, just read the repository description:
DDC/CI monitor control for Windows, including input switching on LG panels that ignore VCP
0x60
So I found deskmux, which is the perfect counterpart to m1ddc. It runs in the background and does only that one thing I want, but it seems like there are not that many people who run into the same problem.
And there was the next catch. Windows can’t send LG’s input command through its normal display API, so deskmux sends it through the NVIDIA driver instead. Luckily my PC has an RTX 5060. With Intel or AMD graphics, I would have hit a wall.
Since I hate software clutter, I chose to install it via the CLI using scoop, so it just stays on the machine without creating shortcuts everywhere.
⚠️ deskmux needs an NVIDIA GPU driving the monitor to switch inputs. Other features like brightness and volume work on any GPU.
scoop bucket add deskmux https://github.com/klaidliadon/deskmux
scoop install deskmux
The switch was easy, and it worked!
deskmux input dp💡
dpis not built into deskmux. It is a name from its example config, where it points to0xD0, LG’s code for DisplayPort. Rundeskmux config initto create the config at%APPDATA%\deskmux\config.yaml, then check the names underinputs.targets.
I press a key, you guys follow
So switching via a terminal was possible. But why would I switch via the terminal? I mean, I was complaining about the many things I have to do to bring the pack over to the other host… I use a Logi MX Master 4 and MX Keys, and they have a Flow feature with the Logi Options+ app. When I push the cursor over the edge of the screen, it jumps to the other computer, and the keyboard follows. But the monitor stays where it is. Flow had quirks, too, and didn’t always work. Also, it lost its settings whenever it updated.
Let’s go through the rest quickly, since I have already been writing for 3 hours about a problem that nobody cares about.
CleverSwitch makes Easy-Switch clever
There is an app called CleverSwitch that works on macOS, Windows and Linux. It listens to your input devices and, by default, lets your Logi mouse follow your Logi keyboard. There are also some customization options to add extra hooks, which is what the previous section was meant for.
macOS
-
Download and install the app via Homebrew (or download the binary).
brew tap mikalaibarysevich/cleverswitch brew trust mikalaibarysevich/cleverswitch brew install cleverswitch brew services start cleverswitch -
Allow all permissions, look for
cleverswitch:- System Settings → Privacy & Security → Input Monitoring
- System Settings → Privacy & Security → Bluetooth
-
Create the hook script that runs the display switch command
mkdir -p ~/.config/cleverswitch
nano ~/.config/cleverswitch/on_switch.sh
chmod +x ~/.config/cleverswitch/on_switch.sh
Add this shell script
#!/bin/bash case "$CLEVERSWITCH_TARGET_HOST" in # In my case I use button 3 3) /opt/homebrew/bin/m1ddc set input-alt 144 ;; # PC on HDMI 1 esac -
Create the config file
nano ~/.config/cleverswitch/config.yamlAnd bind the shell script to the hook
hooks: monitorFollowsKeyboard: path: '~/.config/cleverswitch/on_switch.sh' type: SWITCH -
Lastly, restart the service and press the Easy-Switch button
# Homebrew
brew services restart cleverswitch

# Binary
launchctl kickstart -k gui/$(id -u)/com.user.cleverswitch
Windows
The process here is similar, but we install it by downloading the release from GitHub instead.
-
Download
cleverswitch_windows_x64.zipfrom the latest release:- https://github.com/MikalaiBarysevich/CleverSwitch/releases
- Extract it and run
install.bat(security prompt: More info → Run anyway) - Answer yes to start at login
-
Create the hook script at
C:\Users\<user>\.config\cleverswitch\on_switch.bat@echo off if "%CLEVERSWITCH_TARGET_HOST%"=="1" "%USERPROFILE%\scoop\shims\deskmux.exe" input dp -
Create the config file
C:\Users\<user>\.config\cleverswitch\config.yaml⚠️ Make sure the extension is
yaml, notyml!And bind the batch script to the hook
hooks: monitorFollowsKeyboard: path: '~/.config/cleverswitch/on_switch.bat' type: SWITCH -
Restart CleverSwitch
- Task Manager → Details →
cleverswitch.exe→ End task - Win+R →
%LOCALAPPDATA%\Programs\CleverSwitch→ startcleverswitch.exe
- Task Manager → Details →
Mission accomplished
I’ve never felt so satisfied pressing the Easy-Switch buttons 1 and 3 on my MX Keys. I kept doing it for another 3 hours, just for the fun of it. The HDD cleanup is postponed for the next decade, but now I can switch to Steam while Claude Code is working on my Mac.
Not quite yet (Troubleshooting)
After a week, I noticed that I couldn’t return from Windows to Mac, which made me really upset at that moment. Suddenly, I was shown an error message:
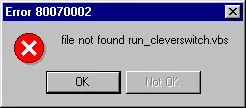
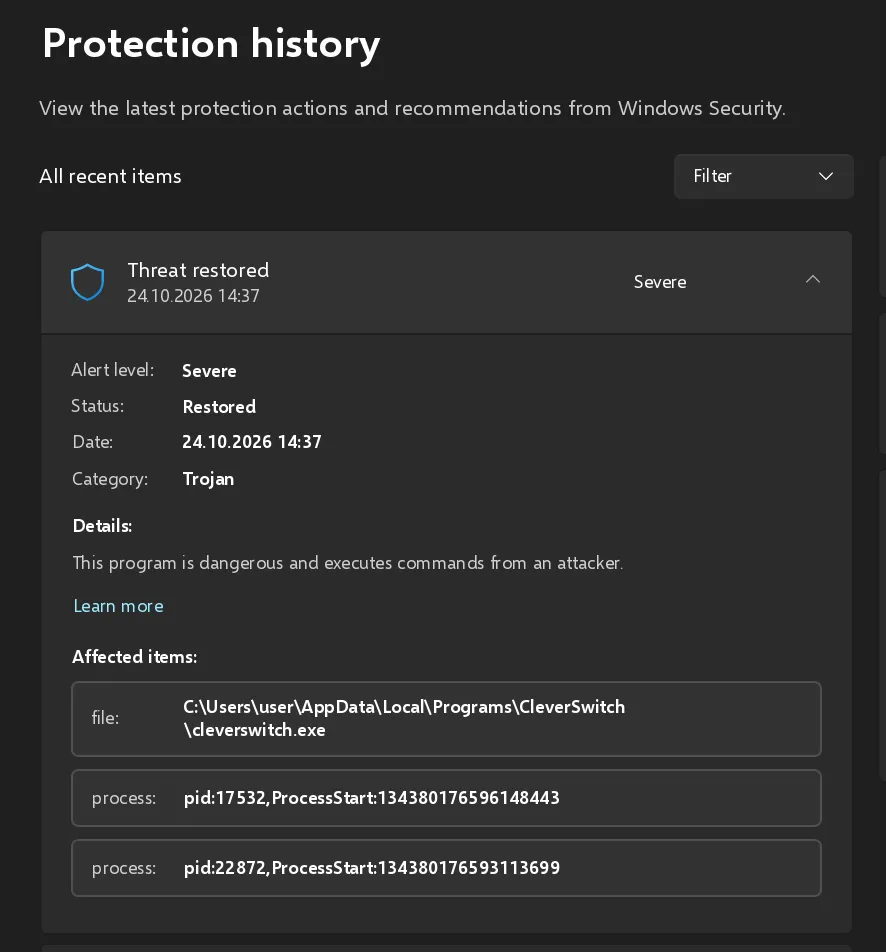
When I asked Claude for consolation, it pointed me towards the mischief-maker, Windows Defender. It flagged CleverSwitch as a Trojan because the exe is unsigned. Whether you trust it enough for an exclusion is your call. I had to restore the file:
-
Restore the executable
- Go to Windows Security → Virus & threat protection → Protection history
- Open the entry for
cleverswitch.exe→ Actions → Restore (or Allow on device)
-
Add an exclusion so Defender leaves it alone
- Windows Security → Virus & threat protection → Virus & threat protection settings → Manage settings
- Exclusions → Add or remove exclusions → Add an exclusion → File →
%LOCALAPPDATA%\Programs\CleverSwitch\cleverswitch.exe
-
Restart the computer. Starting
cleverswitch.exeby hand runs it in the foreground.
💡 If there is no Restore option, Defender deleted the file. Exclude the extract folder, extract the zip again, right-click
cleverswitch.exe→ Properties → tick Unblock, then runinstall.bat.
My take on AI
A year ago, I would have meticulously researched everything by myself, read the manual, understood the errors and more. But I also wouldn’t have wasted time on such a topic if it meant 10 hours of debugging. What’s also remarkable is that since the last time I tried to solve this problem, those libraries have appeared in my search. Some of them didn’t exist back then, and the others I simply didn’t find. Claude often recommends even libraries that no one knows, but that solve a specific problem. Sometimes that doesn’t convince me, because security is a much bigger risk now, and we have to check those recommendations closely.